

Why Prep Makes or Breaks a Paint Job
Most homeowners spend hours agonizing over paint colors and finish types — and then spend about 20 minutes actually preparing the surface. That imbalance is exactly why so many DIY paint jobs end up looking amateur: bubbling, peeling edges, streaky coverage, or color that never quite looks right on the wall.
The truth is, a good paint job is 70% preparation. Experienced painters know this. The actual rolling and cutting-in goes relatively quickly; it's the cleaning, patching, sanding, and priming that takes real time and care. If you're planning your first big interior project, the First-Timer's Roadmap to Home Improvement Projects is a useful starting point for understanding what's involved before you open a single can.
Below are the most commonly skipped prep steps — and what happens when you skip them.
Skipping wall cleaning before painting.
Why it happens: Walls look clean to the naked eye, so homeowners assume a wipe-down isn't necessary. In reality, dust, grease, and household residue act as a barrier between the paint and the surface.
Ignoring small holes, cracks, and surface imperfections.
Why it happens: Minor flaws seem invisible during prep but become glaringly obvious under a fresh coat of paint, which creates light-catching contrast across the surface.
Not using primer — or priming only some areas.
Why it happens: Many homeowners believe a paint-and-primer-in-one product eliminates the need for a dedicated primer coat, especially on walls that already have paint.
Not allowing adequate dry time between coats.
Why it happens: Impatience is the culprit. Homeowners are eager to see the finished result and apply the second coat before the first has cured properly.
Using low-quality or incorrectly sized masking tape.
Why it happens: Generic masking tape is often grabbed out of convenience, but it bleeds paint more easily and can peel off wall finish when removed.
Sanding without removing the dust afterward.
Why it happens: Sanding is seen as the final step before painting, so homeowners go straight from sandpaper to brush without realizing that sanding dust creates a gritty, uneven surface.
What Proper Prep Actually Looks Like
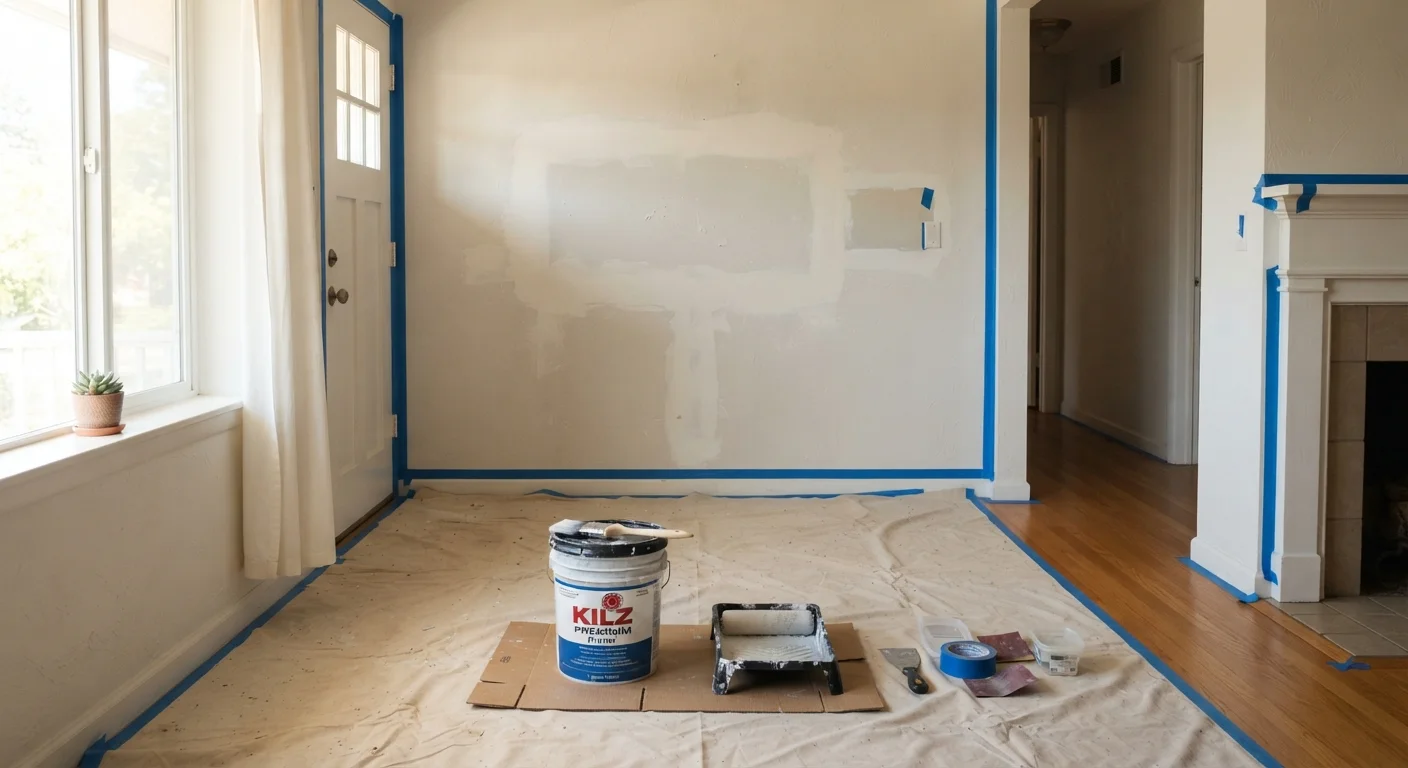
Once you understand the mistakes, it helps to picture what a thorough prep sequence looks like in practice. Before a single drop of paint goes on the wall, you should work through a checklist that covers every surface and transition in the room.
Old Homes May Have Lead-Based Paint
If your home was built before 1978, walls may contain lead-based paint beneath current layers. Sanding or scraping these surfaces without proper precautions can release hazardous dust. Before doing any significant surface prep in an older home, use a lead test kit (available at hardware stores) and, if lead is detected, consult a certified lead abatement professional rather than proceeding with DIY methods.
Start by clearing and protecting the space. Remove as much furniture as possible; what stays gets covered with drop cloths. Take down switch plates, outlet covers, and any wall fixtures. Use painter's tape to mask trim, baseboards, window casings, and ceiling lines — take your time here, because rushed masking leads to messy edges that require touch-ups.
Next, clean every wall surface with a mild degreaser solution or a dedicated TSP (trisodium phosphate) substitute. Pay extra attention to kitchens, bathrooms, and any wall near a doorway. After cleaning, inspect the walls closely under a raking light (a lamp held close and parallel to the surface) to reveal dents, nail holes, cracks, and texture inconsistencies you might otherwise miss.
Fill all imperfections with a lightweight spackling compound or joint compound depending on the depth of the damage. Sand smooth once dry — typically with 120- to 150-grit sandpaper — then wipe the dust away with a slightly damp cloth before priming. Skipping primer on patched areas almost always results in visible dull spots called flashing, even under multiple finish coats. For rooms with dramatic color changes, a tinted primer matched to your topcoat color will reduce the number of finish coats needed.
Planning is part of prep, too. Before you commit to a color or sheen, see the room planning checklist for a structured walk-through of every consideration — from lighting to timeline — that affects your end result.
The content on this site is for informational purposes only and is not a substitute for professional advice. Always consult a qualified professional for guidance specific to your situation.