

Why Toilets Run — and Why It Matters
A running toilet is one of the most common household plumbing complaints, and also one of the most wasteful. A toilet that runs continuously can lose a significant volume of water every day — a cost that shows up quietly on your water bill month after month. The good news is that the vast majority of cases come down to just three components: the flapper, the fill valve, and the float.
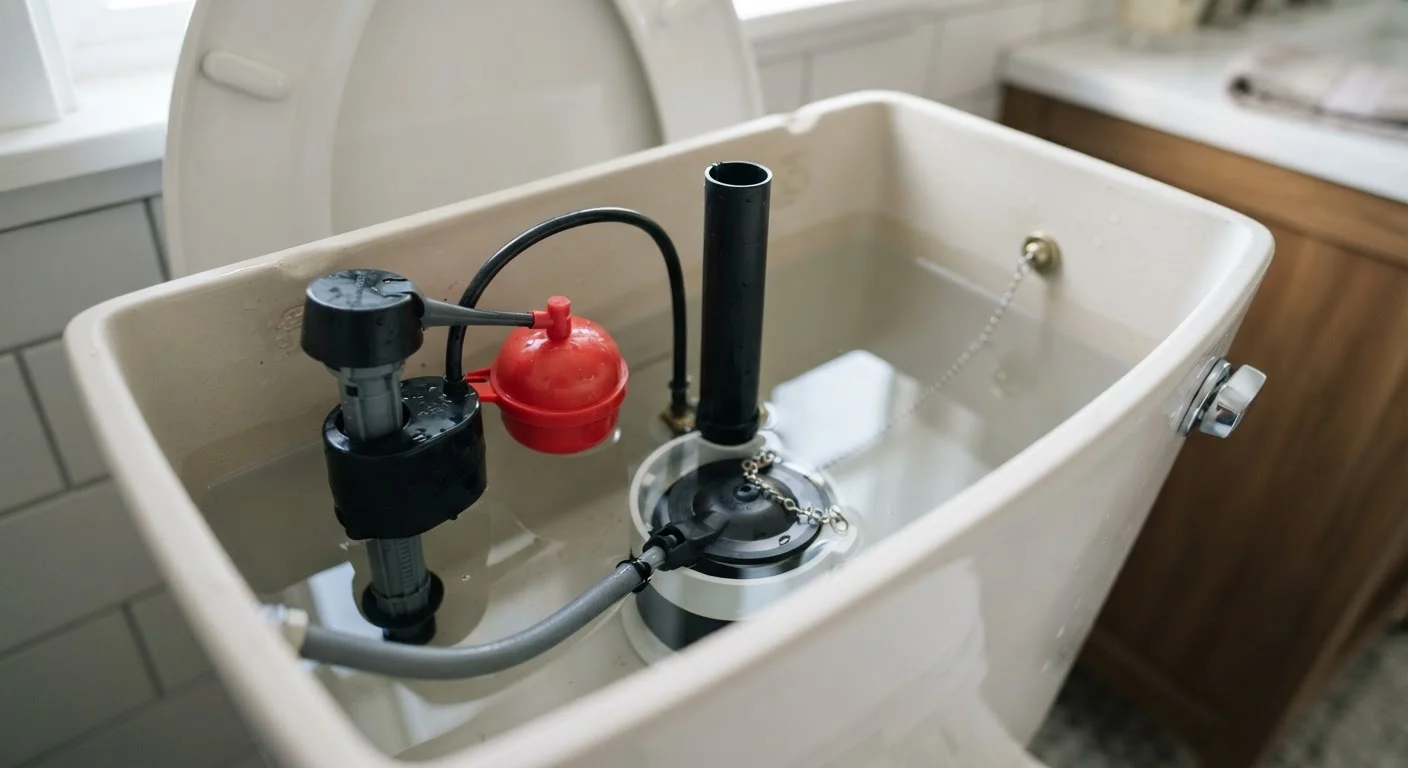
Understanding how these parts work together takes the mystery out of the repair. The flapper is a rubber seal that opens when you flush and closes to hold water in the tank. The fill valve refills the tank after each flush. The float rides the water surface and signals the fill valve to stop when the tank is full. When any of these fail or fall out of adjustment, water keeps moving when it shouldn't.
Test for a Silent Leak Easily
Add a few drops of food coloring to the tank and wait 15 minutes without flushing. If color appears in the bowl, your flapper isn't sealing and is the likely culprit. This simple test saves you from replacing parts unnecessarily.
If you're planning a broader bathroom update alongside this repair, our guide on tackling a bathroom refresh without a full renovation covers other targeted improvements that can transform the space without a full gut job.
What You'll Need Before You Start
This repair requires minimal tools and no special plumbing knowledge. Gather your supplies before shutting off the water so the job moves smoothly. The most important preparation step is identifying your toilet's make and model — usually printed inside the tank or on the underside of the lid — so you can buy a correctly sized flapper if needed.
What you will need
Adjustable pliers
Used to loosen and tighten the fill valve lock nut at the base of the tank.
Replacement flapper
Seals the flush valve opening; replaced when worn or warped to stop water from leaking into the bowl.
Fill valve replacement kit
Replaces a faulty fill valve that won't shut off or cuts off too early.
Sponge or small towel
Absorbs remaining water in the tank after shutting off supply so you can work cleanly.
Food coloring
Used in a dye test to confirm whether the flapper is leaking into the bowl.
When to Call a Licensed Plumber
This guide covers common tank-side repairs that most homeowners can safely handle. If you find cracked porcelain, water leaking at the base of the toilet, or signs of a supply line problem behind the wall, stop and call a licensed plumber. Repairs involving shut-off valves soldered into copper supply lines or any work touching main water lines should always be handled by a qualified professional.
Step-by-Step Repair Instructions
Work through the steps below in order. Diagnosing first prevents unnecessary part purchases, and shutting off the water before touching anything keeps the process clean and controlled.
Diagnose the cause
Remove the tank lid and set it safely aside on a flat surface. Listen and watch while the toilet is running. If water is spilling into the overflow tube — the tall open cylinder in the center of the tank — the float is set too high. If the tank refills but you can hear or see water trickling into the bowl, the flapper is likely worn. Use the food-coloring dye test to confirm a flapper leak before purchasing parts.
Shut off the water supply
Turn the shut-off valve clockwise until it stops. Flush the toilet once to drain the tank, then use a sponge to remove any remaining water so the tank floor is dry. This keeps the work area clean and prevents water from running while you handle internal components.
Replace a worn flapper
Unhook the flapper's ear loops from the pegs on either side of the flush valve seat, then disconnect the chain from the flush handle arm. Bring the old flapper to the hardware store to match the size and shape — flappers are not universal. Snap the new flapper's loops onto the pegs, reattach the chain leaving about half an inch of slack, then restore the water supply and flush to test the seal.
Adjust or replace the fill valve and float
If water is running into the overflow tube, the float is set too high. On a ball-float system (an arm with a round ball), bend the arm slightly downward or turn the adjustment screw to lower the water level about one inch below the top of the overflow tube. On a cup-float fill valve (a tall column with a float that slides up and down), pinch the clip and slide the float down. If the fill valve itself hisses, runs continuously, or never fully shuts off, replace the entire unit — most fill valve kits include clear instructions and require only pliers to install.
Restore water and verify the repair
Turn the shut-off valve back counterclockwise to restore water flow. Allow the tank to fill completely, then flush once. Watch and listen for a full minute: the fill valve should shut off cleanly when the water reaches the correct level, no water should trickle into the bowl, and the tank should remain silent between flushes. Repeat the dye test if you want added confidence that the flapper is sealing.
Turn Off the Water Before You Start
Always close the shut-off valve — the small oval valve on the wall behind or beneath the toilet — before opening the tank or disconnecting any parts. Flushing once after closing it will empty the tank so you can work on a dry surface. Skipping this step risks an uncontrolled overflow.
Knowing when a home repair is within reach versus when it belongs to a professional is a useful skill across many projects. Our breakdown on DIY maintenance vs. taking it to a shop offers a broader framework for drawing that line — even if it focuses on vehicles, the decision logic applies at home too.
The content on this site is for informational purposes only and is not a substitute for professional advice. Always consult a qualified professional for guidance specific to your situation.